I Just Got My Headshots!
What Do I Do Next?
Let’s talk through how to get the most out of your brand new headshots.
You received 3-4 variations of each headshot.
Here’s why, and how to use them:
Your headshots were sent in a new downloadable gallery - each has a specific purpose. Save EACH ONE to your computer.
Full (High) Resolution, Full Photo. This is a printable file (and the only one that should be printed). This headshot label will have one of these words at the end of the file name: “print.”
Web-Sized, Full Photo. This photo is made for web-use only, when you prefer the entire image composition. This headshot has the word, “web”, at the end of the file name.
Web-Sized, Cropped-In Photo. This image is cropped to the standard ratio for headshots, which is a tighter cut - usually just above the top of the head to mid chest. Use this photo for online headshot purposes, including websites, email signatures, etc. This headshot has the word, CROP-WEB, at the end of the file name.
OPTIONAL - if you need a LinkedIn-ready crop of your headshot, let me know! I can provide this upon request for your favorite image.
Q: How were my headshots edited?
A: Naturally.
Our goal with business headshots is to create a great, flattering image of you as you are, not how you wish you were.
Here are the things that I normally include in editing, if needed:
Overall skin texture and tone. I often put a VERY light softening on the skin so that when I sharpen the image, the skin texture isn’t highlighted.
Image exposure. Once in a while, the light may feel too bright or dark depending on how far from the light source you were in the moment, or especially if I’m using any natural light for your headshots.
Background. Sometimes a background needs to be stretched or have lighting equipment removed.
Pimples & Blemishes (but not full acne). I edit out zits and pimples when they are just a few and would normally be covered well with makeup on set.
Contrast and Sharpening. Another way I love to help images feel highly professional is to create a touch of contrast and a very light sharpening.
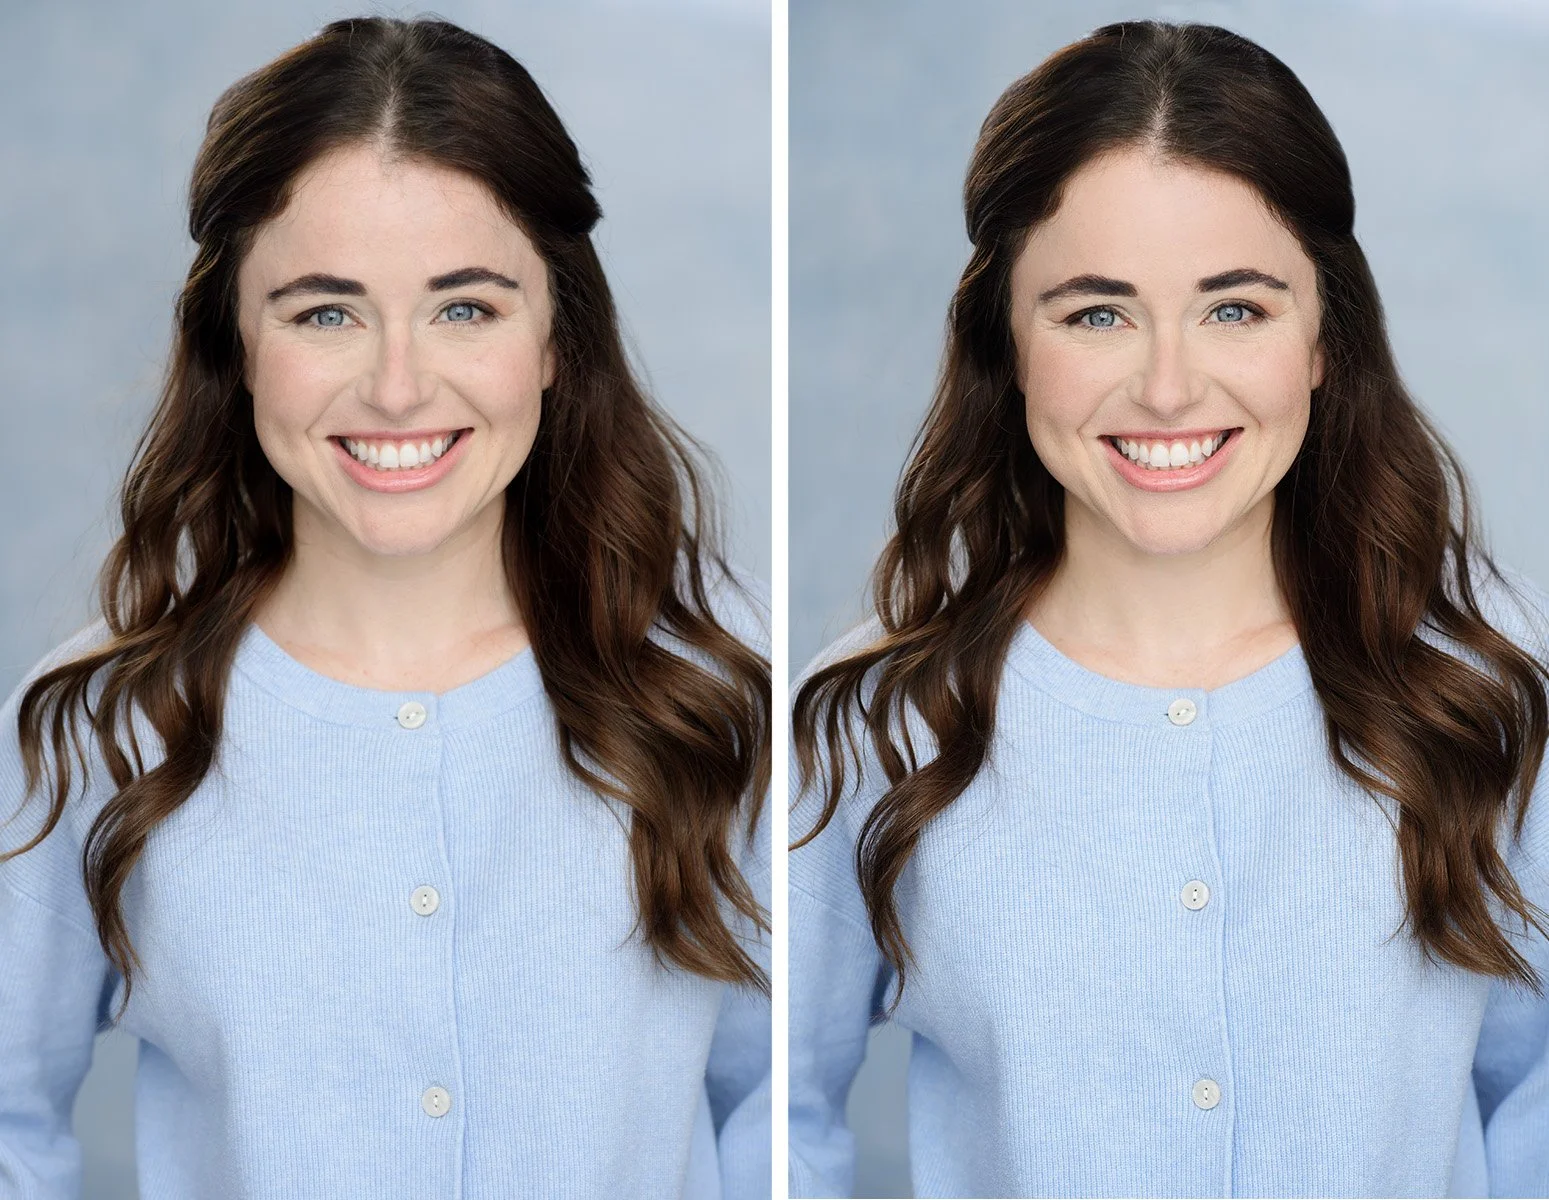
Here is an example of a typical edit. The original photo is good, but just needed a touch more color, hair bulge adjustment, minor stray hair removal, the lightest skin re-touch, and overall “pop” created by sharpening and contrast. This photo is only enhancing her true appearance, not creating a false image of her - which is always the goal when retouching your headshots!
I try to get the images usable right out of camera, so that editing can be very light and natural.
Here are a few things that are NOT edited in your business headshots. This way, they look natural:
Fine lines and most wrinkles. These will remain in your headshots so you have an accurate representation of who you are. As nice as it is to soften those wrinkles away in post production with other photos and selfies, it’s not a true representation of who you are in this moment (and let’s face it - you’ve earned every one of those smile lines!)
Body size and shape. I try to create an image in-camera that is flattering using posing techniques (anyone get the “pull your head forward like a turtle” instruction? :) - it’s not my goal to create headshots that make you look “20 pounds thinner wink wink.”
However, if you DO want a bit of nip and tuck, I can do a more extensive edit on your headshots for $25 per photo and help out with your specific requests :)
Under eye color is not totally removed because it makes eyes look puffy.
However, this is actually one thing that I will have softened if your under-eyes seemed too dark to me. If you got the professional hair and makeup, this will be a non-issue. And as a general rule, anything that can be fixed with makeup like under-eye color is fair game for me in post production
Most stray hairs.
I will remove any single hairs that may have strayed across the face, or seem a bit too wild outside your silhouette. If we remove ALL stray hairs outside the head, then it starts to look very fake. Usually I tackle the ones closest to the top of the head.
Stray hairs that are too many (as we can see sometimes over the neck or shirt) must remain nearly in full, lest I have to paint a new skin on or shirt. That type of editing seems a bit too obvious and will make your photo look fake.
Roots showing from undyed hair.
Skin discoloration or red patches. I don’t change your skin color in any way. How you come to your headshot session is how we assume you want to appear in your headshots
If you feel you need a re-do with the makeup artist added to your session, get in touch - I will try to help out on my end with the HMUA cost or set up a custom mini session.
Wrinkles in your shirt. If you brought a shirt that has wrinkles, those are too difficult to remove and still remain believable. However, if it was just one or two lines, on a non-textured shirt, those I would have likely taken care of for you.
Save your chosen, edited headshots safely - back up your images
In addition to saving your photos onto your computer, I strongly recommend backing up your images on the cloud or an external drive.
I archive only the images that you chose for 6 months.
IMPORTANT: I do not save any images that were not chosen initially.
Please make sure to order any images you may want up front. I will hold on to the entire set of images and keep your gallery live for 7 days after your edits are sent, and then do not keep the un-chosen photos - it’s just too much for me to store images that aren’t needed :)
If you’d like another few beyond what was included with your session, you can order individual images (which will be edited) here for $25 each